Archive
Lime Cupcakes

I recently treated myself to the Hummingbird Bakery Cookbook, sold mostly on the pictures of the amazing cakes within. When I googled it, I was intrigued by the mixed reviews of this book all over the internet, some people rave about it, others complain they cannot get the recipes to work.
Admittedly, the cupcake recipes are unusual for the seasoned baker – no creaming of butter and sugar, and ingredients in different amounts (as opposed to the usual equal parts flour, sugar, eggs and butter). However, the book promises, if you follow the instructions, you’ll end up with the desired result.
With baking, it’s best to follow instructions anyway, as it’s a little more science-y than other cooking, and I usually follow instructions at least the first time, before I start playing with flavours and the like. Here, the only change I made was to substitute lemon for lime, as I had some limes that needed using, and I do love the flavour of lime.
The recipe said I would get 12 cupcakes from the mixture, although I only got nine, and even then was worried these wouldn’t fill their cases on baking since the mixture looked a little scant – the cases should be two-thirds full. However, I did get flat-topped cupcakes, something I wouldn’t have achieved if I’d tried, so they would have been good for runny, glace icing. And the shortfall was lucky really, as I suspect the frosting recipe wouldn’t have stretched to 12 either.

It’s also worth pointing out, for us in the UK, you need the larger paper cases for these, the ones sold as ‘muffin cases’. Well, who could complain about bigger cupcakes anyway? The end result was good – nice moist sponge, sharp yet sweet lime frosting (which I would definitely adapt and use elsewhere!) – so overall, I’m pleased and can’t wait to make more from the book.
Recipe based on The Hummingbird Bakery Cookbook’s Lemon Cupcakes
Lime Cupcakes (makes 9)
- 120g plain flour
- 150g caster sugar
- 1 1/2 teaspoons baking powder
- 2 tablespoons lime zest
- 40g unsalted butter
- 120ml whole milk
- 1 egg
For the lime frosting:
- 250g icing sugar, sifted
- 80g unsalted butter
- 2 tablespoons lime zest
- a couple of drops of food colouring (optional – I used a touch of yellow)
- 25ml whole milk
Preheat the oven to 170°C, and, as ever, ensure your baking ingredients are at room temperature. Especially the butter. Place 9 muffin cases into a cupcake/muffin tray.
Put the flour, sugar, baking powder, lime zest and butter in a mixing bowl, and beat, on a fairly slow speed, with a handheld electric whisk (or, if you’re lucky enough to have one, a freestanding electric mixer with a paddle or beater attachment) until everything is combined, and you have a kind of sandy consistency.
Still beating, gradually add the milk. When incorporated, add the egg. Continue to mix for a minute or two more, until everything is smooth, but don’t overwork it. While you’re mixing, you may need to push in any unmixed ingredients from the side of the bowl with a silicone spatula.
Spoon the batter into the cases until they’re two thirds full at most. Bake for 20-25 minutes, or until the sponge bounces back when touch. A cake tester or skewer poked in the middle should come out clean. Leave the cupcakes to cool in the tin for five minutes before placing onto a wire rack to cool completely.
To make the frosting, beat together the icing sugar, butter, lime zest, and colouring if using, again using either an electric whisk or a handheld mixer, on a slow to medium speed, until well mixed and coming together. With the mixer on a slow speed, add the milk slowly, and when everything is incorporated, turn the mixer up to a high speed. Carry on beating until the mixture is light and fluffy, for at least five minutes, but, apparantly, the longer you go, the lighter and fluffier the frosting gets.
When the cupcakes are completely cold, spoon the frosting on top. Allow the frosting to set a little before serving.
The World’s Best Hotel
Hotel Chocolat, let me count the ways in which I love thee…
Well, firstly, there’s my Chocolate Tasting Club solid selection box which arrives through my door every month, and I’m, along with the OH, steadily working my way through the latest package of goodies which arrived last week.
Secondly, there’s your amazing quality chocolates, including your high cocoa percentage milks and your seriously tasty darks.
Thirdly, there’s your Rocky Road mini slab. Enough said.
And you’re kind of ethical too. Well done.
A Bit of a Different Sweet & Sour Sauce
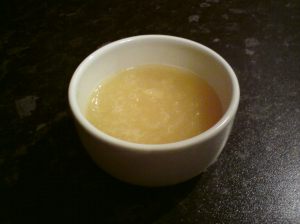
Continuing with the sweet & sour mini-series I seem to have going today, this is the first of two sweet and sour sauces. This is the one from Chinese Food Made Easy that goes with the original Sweet & Sour Pork recipe. It’s different from the traditional, but really light and refreshing, and goes very well with the slightly spicy crunchy coated pork. Do try this, but if you prefer the usual, orange coloured, tangy, sugary style sauce, then try this too.
I used to find it difficult to find Shaoxing rice wine, not having a good chinese supermarket nearby, but have discovered Waitrose sell one as part of their ‘Cook’s Ingredients’ range, but dry pale sherry is a perfectly fine substitute.
Recipe from Ching-He Huang’s Chinese Food Made Easy
A Bit of a Different Sweet & Sour Sauce (serves 2)
- 125g tinned pineapple (in natural juice, not syrup)
- 125ml pineapple juice (from the tin is fine!)
- 3 tablespoons lime juice (freshly squeezed is best, but I have used the bottled stuff)
- 1 tablespoon light soy sauce
- 1 tablespoon Shaoxing rice wine (or dry sherry)
- a pinch of ground white pepper
Put the pineapple, pineapple juice and lime juice into a blender, a blitz, but not too much, until you have a smooth-ish sauce – I like mine a little ‘pulpy’.
Transfer to a saucepan, bring to the boil and then simmer for 2 minutes or so, until the sauce reduces and thickens a little. Season to taste with the soy sauce, rice wine and pepper. Simmer for a further minute and then serve with crunchy coated pork, chicken or turkey, over egg fried rice.
Chinese Takeaway Style Sweet & Sour Sauce
There are lots of different recipes for sweet & sour sauce, and I’ve tried lots of variations in a, possibly a little sad, mini-quest for perfection, by which I suppose I mean one that best approximates my favourite takeaway’s sauce that I can easily make at home. While I’m certainly not saying this is the definitive sweet & sour sauce, I think it’s pretty good. Drawing inspiration from all over, not least this recipe, this is quite a good approximation of the thick, sticky orange sauce we all know and love.
Ok, the list of ingredients is quite long, but stick with it, it’s worth it, and you may have most of the storecupboard stuff in anyway if you cook Chinese food a lot, or will end up amassing it if you plan to. I’ve suggested pineapple, red peppers and water chestnuts to make a chunky sauce, but play around as you wish. Tinned pineapple is fine, and water chestnuts you can buy either tinned or vacuum packed. In both cases, I’ve successfully frozen the leftover contents of the packages for use another time.
Chinese Takeaway Style Sweet & Sour Sauce (serves 2)
- 1 teaspoon toasted sesame oil
- 1 clove garlic, finely chopped
- 1 x 2cm piece root ginger, peeled and grated
- 2 tablespoons light soy sauce
- 1 tablespoon white wine vinegar
- 1 tablespoon rice vinegar
- 2 tablespoons tomato ketchup
- 4 tablespoons pineapple juice
- 1 tablespoon soft, light brown sugar
- 2 tablespoons clear honey
- 2 tablespoons sweet chilli sauce
- pinch of salt and ground white pepper
- 1 tablespoon cornflour, stirred well into 4 tablespoons water
- 50g pineapple chunks
- 50g water chestnuts, sliced
- 1 small red pepper, cut into chunks
Heat the toasted sesame oil in a small saucepan, and then add the garlic and ginger. Stir fry for about 30 seconds. Add the soy sauce, vinegars, ketchup, pineapple juice, sugar, honey and sweet chilli sauce. Stir everything together well.
Season with a pinch of salt and ground white pepper, and then simmer for a minute or so. Stir in the cornflour mixture, and stir, over the heat, until the sauce begins to thicken a little.
Add the pineapple, red pepper and water chestnuts, and cook for 1 – 2 minutes, until everything is heated through. Serve with crunchy coated pork, chicken or turkey, over egg fried rice.
Sweet & Sour Crunchy Coated Pork (or Chicken, or Turkey)
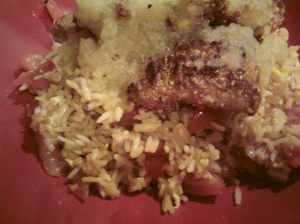
Returning, once more, to Ching-He Huang’s Chinese Food Made Easy, this is the first meal I cooked from the book. Everyone loves sweet & sour, no? So, this is my adaption of this recipe, and I think the crunchy coated meat would work in a number of dishes, so I’ll post separately two ideas for a sweet & sour sauce.
Recipe adapted from Ching-He Huang’s Chinese Food Made Easy
Sweet & Sour Crunchy Coated Pork (or Chicken, or Turkey) (serves 2)
- 2 pork loin steaks, fat removed, or 2 chicken breasts, or 2 turkey breast steaks
- 6 tablespoons dry roasted peanuts, or the same amount of whole roasted soya beans and a pinch of salt
- a pinch of ground white pepper
- 1/2 – 1 teaspoon dried red chilli flakes (to taste)
- 2 tablespoons ground nut oil
Place your meat between two sheets of clingfilm on a suitable surface, and then bash with a rolling pin or other appropriate instrument until it’s about half the thickness it was. Cut the meat into large chunks (or leave as whole, large steaks if you wish).
Next, make the crunchy coating for the meat. Tip the peanuts and chilli flakes into a mini-chopper or food processor, and a pinch of ground white pepper, a blitz to a coarsely ground coating.
Pour the coating onto a plate or shallow dish, and then firmly press each side of the meat pieces into the crumbs until well coated.
Heat the ground nut oil in a large frying pan, or wok, and cook for 2-3 minutes on each side, until thoroughly cooked. Serve with this fresh modern take on sweet & sour sauce, or this more traditional takeaway-style one, and egg fried rice.
Egg Fried Rice with Tomatoes

I just love Chinese food, with its wonderful flavours, and quick, easy cooking. I’ve already talked about Ching He-Huang’s Chinese Food Made Easy, which, I think, is a fantastic book, and has encouraged me to try some Chinese cooking at home, and the results have always been great. Cooking Chinese food at home really isn’t too difficult, and much better for your waistline and wallet than ordering takeaway!
I’m going to post a couple of sweet & sour recipes later, but thought I’d start with egg fried rice, as it is my favourite side dish to a Chinese meal, and really goes well with sweet & sour! This recipe is adapted from the Beijing Rice in Chinese Food Made Easy. I’ve reduced the amount of rice, and I think what I’ve suggested is enough of a side for two people, although I haven’t reduced the amount of seasoning, particularly the toasted sesame oil, as this is simply one of my favourite flavours – by all means reduce the amount slightly, or increase the rice up to about 400g, as my preference is for this rice is to have it really flavour-packed, if a touch oily. By all means, change the vegetables too. I love the crunch of the spring onion added in at the end, so my recipe calls for more than the original.
When making egg fried rice, you need to have cooked rice, and its easier to do this the day before, but do bear in mind you need drain it well, cool it quickly, refrigerate it and ensure it is fully reheated. If that all seems like a bit of a hassle, then you can cheat! This rice, and others like it, are designed for microwaving but are basically little packages of cooked rice, in a little oil to stop it sticking, that stir fry really well. I use it all the time, and would use one 280g packet in place of the 300g cooked rice in this recipe. It’s best to break it up in a bowl before you add it to the wok.
Recipe adapted from Ching-He Huang’s Chinese Food Made Easy
Egg Fried Rice with Tomatoes (serves 2)
- 1 – 2 tablespoons ground nut oil
- 2 eggs, beaten
- 300g cooked jasmine rice
- 3 tomatoes, de-seeded and sliced
- 2-3 tablespoons light soy sauce
- 2-3 teaspoons toasted sesame oil
- pinch of ground white pepper
- 4 – 5 spring onions, finely sliced
Heat a wok until very hot, and then add a tablespoon of ground nut oil. When the oil is hot, add the eggs and scramble for a minute or two, until just cooked. You should probably remove the eggs at this point, and set aside to be re-added later, but I’ve never bothered and haven’t really noticed it being overdone.
If needed, add another tablespoon of ground nut oil to the wok. Tip in the rice, and stir fry for a minute, then add the tomatoes and stir fry for a further 3-4 minutes.
If you’ve removed the egg, stick it back in at this point. Season, to taste, with the soy sauce, toasted sesame oil and pepper, and then add the spring onions. Give everything a final stir, and serve immediately.
Smoky Chicken & Bean Stew
Ok, I admit it, I’m perhaps a little obsessed with chorizo. Honestly, not every meal I cook is based around this spicy little Spanish number, but it is really useful – it’s really tasty, adds great flavour to dishes, and goes well with other ingredients I seem to be using a lot right now, like chicken, red peppers, beans and tomatoes, all of which lend themselves to easy, one-pot stews like this.
I’m quite a new convert to chicken thighs. I was never this biggest fan of the dark meat from chicken, and convinced myself that breast meat was best, but thighs are great. They’re full of flavour, much more so than breast meat, and tend not to try out so much. And, they’re cheaper to boot.
You could maybe spice things up here by adding a finely chopped, de-seeded red chilli. As ever, chicken stock from good quality bouillon concentrate is fine.
Smoky Chicken & Bean Stew (serves 2)
- 1 red onion, sliced
- 2 cloves garlic, finely chopped
- 1 tablespoon olive oil
- 1 tablespoon smoked paprika
- 1 red pepper, de-seeded and roughly chopped into chunks
- 4 boneless, skinless chicken thighs, each cut into 3-4 strips
- 100g chorizo, sliced into coins and then each slice halved
- 4 tomatoes, de-seeded and roughly chopped
- 1 x 400g tin borlotti beans, rinsed and drained
- 300ml chicken stock
- 15g fresh coriander, roughly chopped (about half of a standard supermarket packet)
Heat 1 tablespoon of oil in a large pan or suitable casserole dish, and throw in the onions and garlic. Cook for 3-5 minutes until softened, but not brown. Add the smoked paprika and red pepper, stir well and cook for another 2 minutes.
Add the chorizo and chicken to the pan, and fry for 5 minutes, until the chicken is browned and the chorizo is releasing its fat.
Add the tomatoes and beans, and then pour over the chicken stock. Bring to the boil and then simmer for 20 minutes, until the sauce has thickened and the chicken is completely cooked.
Scatter over the coriander. Serve with warmed pitta breads.
More Online Haunts for Foodies
So much to do, so little time! I have several posts, half written, half in my head, all delicious, that I want to get up here (and will do… come back soon for apple crumble, lime cupcakes with really good frosting, and something savoury too!), but in the absence of time, thought I’d update my little links section today.
There are so many great food blogs out there, I’m trying to keep my list of links to those I visit the most, some of them daily, and, perhaps most importantly, those that make me want to preheat the oven and start weighing, chopping and salivating.
So, my latest additions, and do check them out, are, firstly The Kitchn, a vast repository of all things food – great recipes, the answers to questions you need to know, equipment reviews and more. This multi-contributor site is updated frequently, and I find myself drawn to it at least daily.
Next up is Mowielicious, with fantastic food, but, and perhaps the draw for me, the most amazing, beautiful photography, something I clearly need to get better at. Plus, who could not like a site belonging to someone who lists baking, sunshine and everything pink as their favourite things.
Finally, for now, Jam and Clotted Cream. Firstly, I had to overcome my jealousy at anyone who lives in Cornwall. How lucky! But, some really great recipes, especially the desserts.
Enjoy! I’ll be back later with some food of my own!
Nigella’s Hot Chocolate Sauce
Having a quick and easy chocolate sauce in your repertoire is really useful for all manner of things. Hot fudge sundaes, of course, tarting up shop bought ice cream, a fabulous dip for fresh fruit, or for pouring over a hot chocolate pudding, in place of, or better still in addition to, ice cream or cream. And, of course, for this.
This is my standby chocolate sauce of choice, from Nigella Express. Firstly, don’t be alarmed by the addition of Camp coffee (a thick syrup of coffee, sugar and chicory used to make a no-doubt vile instant coffee drink, but extremely useful in cooking) or strong espresso, this doesn’t make it a coffee-chocolate sauce, but adds a real depth of flavour and richness to the sauce. The golden syrup, meanwhile, makes everything glossy and shiny, and who could argue with that?
Nigella’s Hot Chocolate Sauce (likely enough to generously pour over 4 puddings, at least)
- 75g dark chocolate (70%)
- 125ml double cream
- 2 tablespoons Camp coffee, or 2 teaspoons instant espresso powder dissolved in 2 tablespoons hot water
- 1 tablespoon golden syrup
Break up the chocolate into a heavy based saucepan, and add the cream, coffee and syrup. Melt slowly over a low heat, stirring, until everything is melted and combined. Pour into a jug or other suitable vessel from which to pour over your pudding.
Hot Flapjack Pudding and Ice Cream
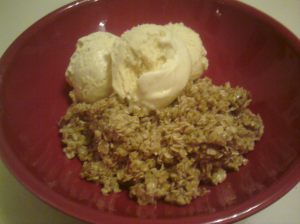
For some people, the best part of making a cake batter is licking the bowl. For others, cookie dough is a foodstuff in its own right. This is, then, perhaps inspired by that idea. It stemmed from a light night craving for a hot pudding, but also a desire for something quick and easy that didn’t need any shopping. Essentially unbaked flapjack mixture served warm, with good, shop-bought vanilla ice cream, it would be a stretch to call this a recipe, and, unusually for me as I don’t often use it, the cooking instructions are for the microwave, although if that is a little déclassé for you, then by all means use a large saucepan over a low heat.
I’ve written quantities below, but usually I would just guess – throw a chunk of butter in the bowl, add a similar quantity of demerara sugar and drizzle over what looks like two tablespoons of golden syrup. Once melted, stir in oats until it seems like no more can possibly be coated in the sticky mixture, although know it will absorb more than you likely think.
Delicious just with ice cream, and, if you think of it as flavoured porridge then definitely a health food, and comforting as it is, for an added indulgence, hot chocolate sauce drizzled over makes this heavenly. I would recommend Nigella’s Hot Chocolate Sauce from Express, (which I’ll post next, and note you’ll probably only need half the quantity for pouring on this), which sets a little over the ice cream, but oozes through the warm flapjack to flavour all with chocolate, although admittedly this makes this a little, if not much, more of an undertaking.
Hot Flapjack Pudding & Ice Cream (serves 2)
- 100g butter
- 100g demerara sugar
- 2 tablespoons golden syrup
- 200g porridge oats (not instant), maybe more
- good, shop-bought vanilla ice cream, to serve
- hot chocolate sauce, if desired, to serve
Put the butter, sugar and golden syrup into a large, microwave safe bowl, and, on full power, melt in 30 second blasts, stirring well between each, until everything is runny and incorporated.
Pour in about half of the oats, and stir well until everything is combined. Continue adding the remainder of the oats, a few spoonfuls at a time, and mixing well. Return to the microwave for 30 seconds to a minute, to warm it all through again, and then divide between two bowls and top with a few scoops of ice cream. Devour, preferably in slippers on the sofa. Burning log fire in the background optional.